


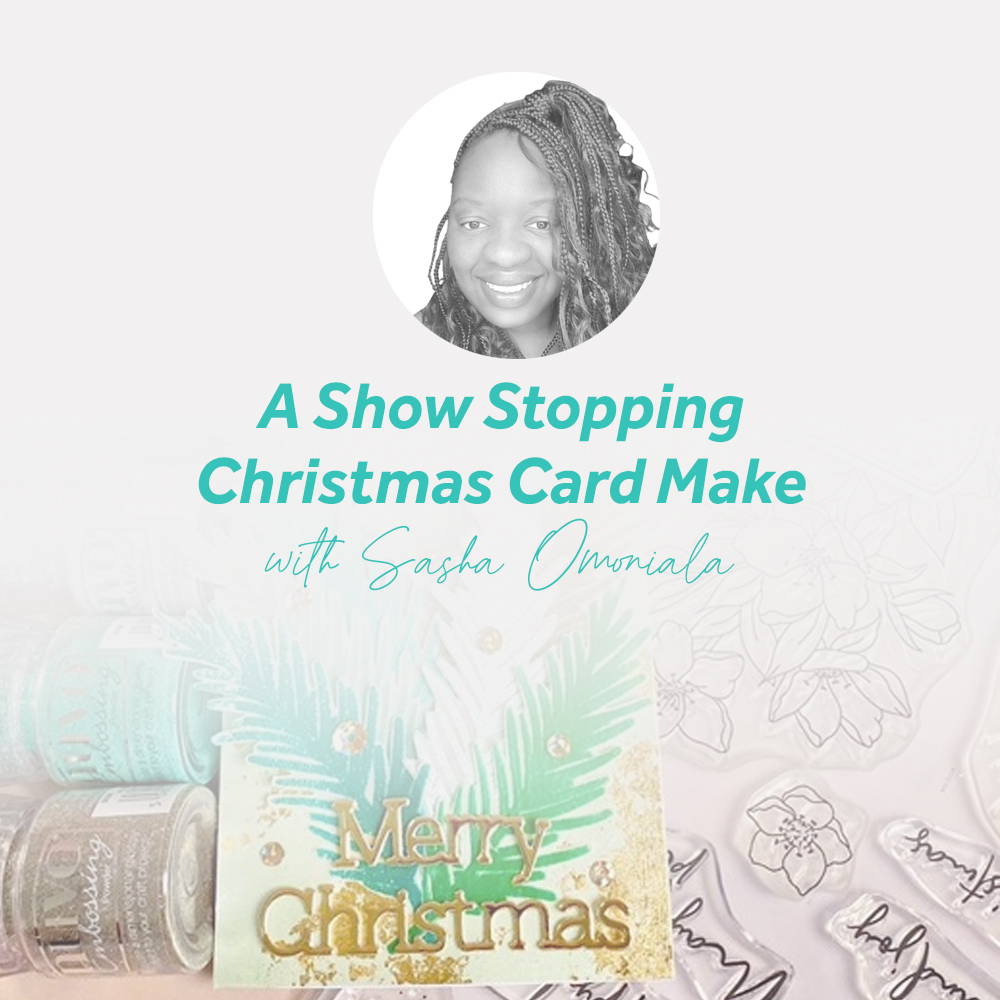

Hello lovely crafty friends, I’m Sasha. So today we are going to be hopefully getting a head start on our Christmas card making with this beautiful Christmas Rose stamp set. It's a super simple but very effective card that you can definitely mass produce as long as you have the patience of 10 Saints haha.
To make the Christmas Card, you will need the following:
- Christmas rose stamp club set
- Blue frost pearlescent cardstock
- Harvest Gold mirror card
- Gold gilding flakes
- Champagne shine pure sheen sequins
- Nuvo embossing powder in pine needles, twinkling tinsel, turquoise lagoon, pearled pistachio, glimmering green and snow crystal
- Heat resistant vellum
- Clear mark embossing ink
- Anti-static bag
- Heat gun (for heat embossing)
- Scissors (for fussy cutting)
- Tiny blending brush or paint brush
- White cardstock for card base
Step 1

Take a sheet of blue frost cardstock and cut it into a 3.5” x 8” panel. Then use your small blending brush or paintbrush to brush on some Nuvo deluxe adhesive (or use the flat tip glue pen). It doesn’t have to be in a particular pattern, you are just applying a light layer of glue in random shapes.
Step 2
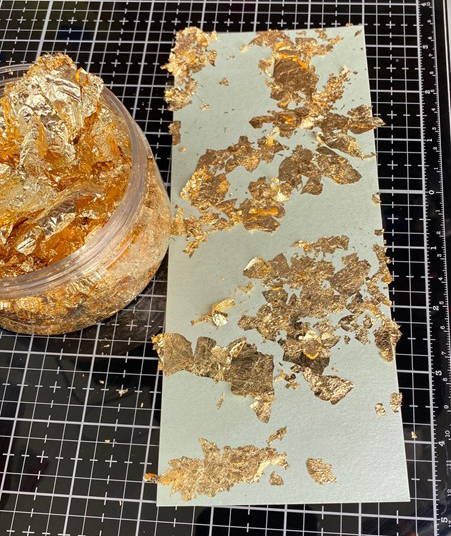
Add your gilding flake over the sticky bits and leave for about 20 seconds so that it adheres and dries slightly.
Step 3

Grab a hard bristle paintbrush or one of the Tonic surface sweep brushes and brush off the excess gilding flakes. TIP: use a sheet of copy paper to collect the excess gilding flakes so that you can put them back in the bottle.
Step 4
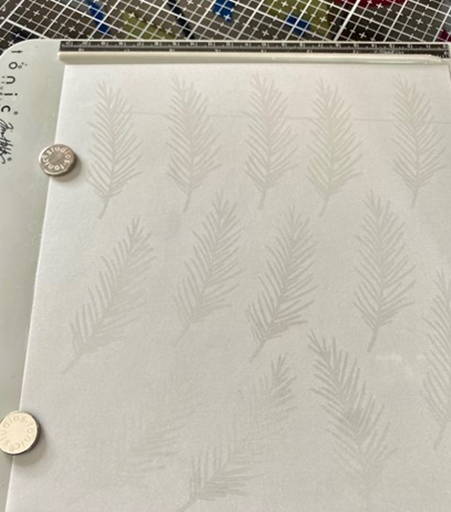
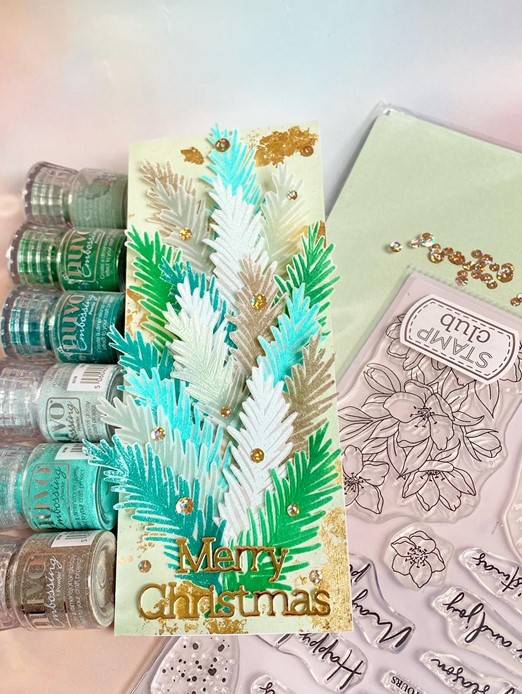
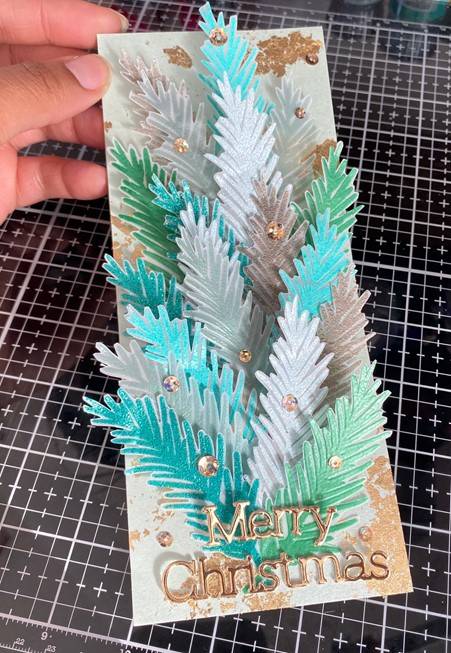
Grab your vellum, stamping platform, and embossing ink. Take the leaf stamp from the stamp club set and start stamping it onto the vellum with the embossing ink. Don't forget to use your anti-static bag before you stamp. In total I made 3 leaves for each colour of embossing powder so 18 leaves in total.
Step 5

Fussy cut out all your leaves. I'm sorry this leaf doesn't come with a die because that would make things easier. Just pop on a tv show and get cutting you will be done in no time.
Step 6
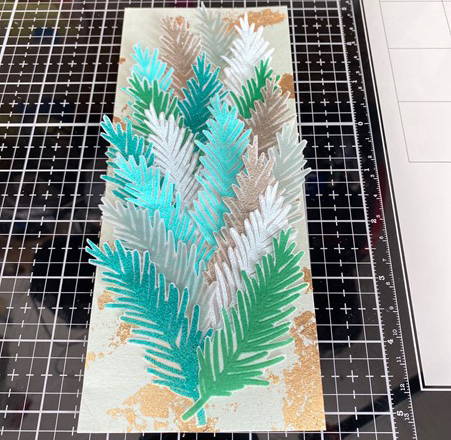
Grab your blue frost panel and start figuring out how you want to arrange your leaves but don't glue anything down yet.
Step 7
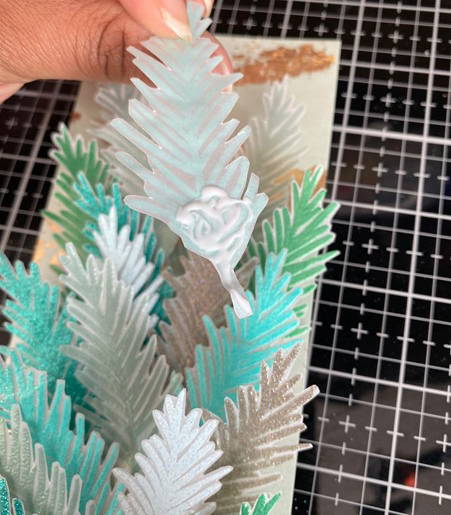
Once you have a design you like, start sticking down your leaves. I worked from the bottom going up but you can work from the top going down. The trick is to add a dab of glue to the bottom inch or so of your leaf then stick it down.
Step 8

Once you’ve done about three or 4 leaves the first ones should have adhered so you're going to give them a bit of a lift off the page by bending the vellum upwards slightly. I think this adds a beautiful dimension to the card and really gives it that wow factor. Just imagine what a showstopper it's going to be on the mantle.
Step 9
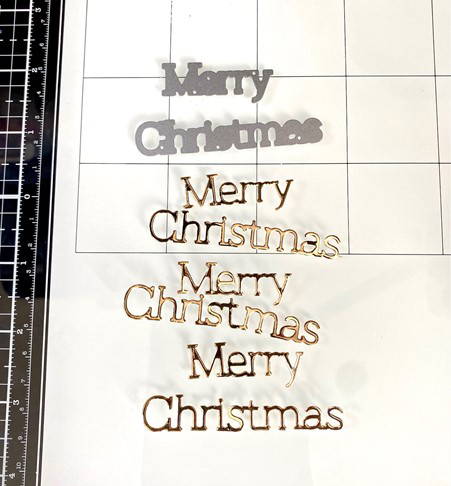
Die cut a sentiment three times with the word dies from the stamp club set. I went with Merry Christmas. Take all three dis cuts and stick them on top of each other to give your sentiment some dimension and stability. Then stick it onto the bottom bit of your card. Remove the protective layer from the acetate and then glue on your sparkly top layer.
Step 10
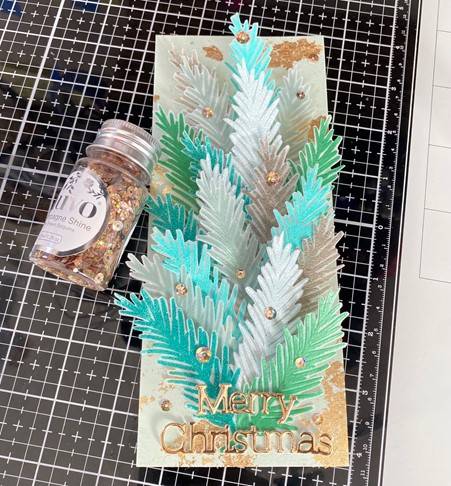
Now add some gold sequins wherever you would like for some extra pizazz. Once everything is dry take your panel and add it to your card base. To make a card base you need a piece of cardstock that is 8” x 7” which you are going to score at 3.5 then fold it. Now stick your complete panel over your card base and you have made a festive slimline card!
Thank you so much for crafting along. Hopefully once you've had one go, then you can make plenty more.
Buy The Craft Project
